Photogravure
 Back when photography was new, an issue arose right away: photographs were great, but also extremely labor intensive to produce in quantity for things like books. Printing presses were a fabulous way to mass produce text and engravings in a high quality way, but photographs required significantly more labor and time to produce individually, and their archival properties weren't fully understood. As luck would have it, some of the same guys who figured out photography also figured out how to make photographic plates for printing presses in the 1830s, and the photogravure process has been refined over time since. It was a brilliant idea: intaglio printmaking technology had been around since the 1400s (according to Wikipedia's intaglio printmaking page), and so the tools, presses, and inks were all available and well understood - the new technology could easily rely on the old infrastructure and craftspeople.
I have been testing out many of the 1800s processes used for making photographic images, and had wanted to try photogravure for a while - I had always loved the images in Stieglitz's publication Camera Work, which were all hand printed photogravures. If I ever edition sets of prints, gravure would be a GREAT way to produce them. Printmaking is a very practical fine art, and I wanted to know a bit more about how I could use it to make prints with the images I've been shooting for special printing processes in general.
The San Francisco Center for the Book (sfcb.org), a local bookbinding school that offers a range of classes in book-related arts, has offered several tempting classes on printing technologies. Last year I took a class on how to make photopolymer plates for relief printing, but it didn't seem right for me. The resulting raised (relief) plates required a lot of adjustments for printing photographic images, and there were many challenges involved in making continuous tones. (If a print is made by having a raised section covered with ink, how do you indicate lighter and darker sections? You wind up needing to represent lighter sections in raised dots that are far apart from each other...) Once the plates were made, printing presses capable of using raised plates were required, which meant that I'd need training on more specialized (and expensive) equipment, and training on ink handling (and related solvents). After I took the class, the alt process mailing list discussed experiments in plate making with different types of relief plates and their related difficulties at length, and I decided the process wasn't quite what I was after.
A new SFBC catalog arrived, and it contained a different type of photopolymer plate-making class: one that makes intaglio plates (etched valleys in the plates) rather than raised dots and lines. I signed up, and spend 10 hours learning how to use ImagOn film to make plates that can be used in a simple etching press using non-toxic inks.
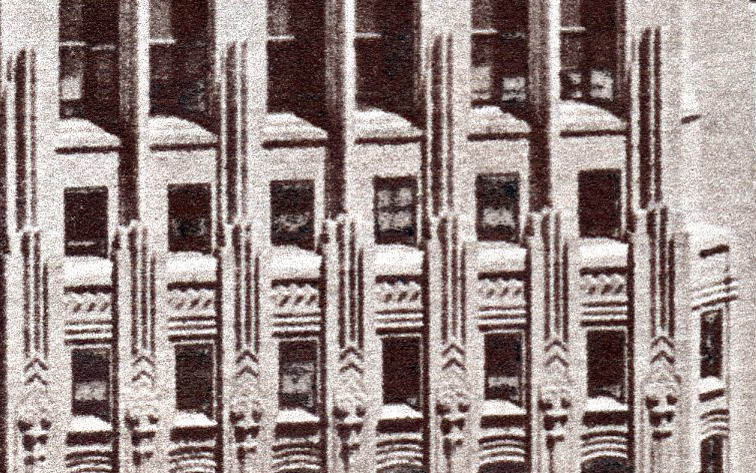 The photo-sensitive film is adhered to metal base plates with water, is exposed to positive film under UV light, then soaked in a non-toxic solution. The unexposed parts of the film dissolve away, while the exposed sections harden to different thicknesses/depths, depending on how much light received (how much light made it through to the film, based on the density of the positive). Those etched sections form little pits which hold varying amounts of ink, which are released onto damp paper in a high-pressure etching press. The entire process is non-toxic to the user, and produces images of fine tone and detail.
This version of the process uses the least complex equipment, is the least toxic, and takes full advantage of digital tools in preparation of the film positive - it's the best of all worlds. Inking the plate and handling it is messy, and I will need to rent equipment to do this, but the images resting in their deep indentations (made by the plate) are just so gorgeous... And completely archival, of course.
When I have a chance to do more, I'll post work and links to my instructor's site on my photography site. I plan to post sample images from my first day of printing at my gallery at alternativephotography.com next month.
Yes, I am a geek. And it's FUN.
Labels: photogravure
posted by Arlene (Beth)3:38 PM
![]()